WepsTech
Your Daily Dose of Tech News
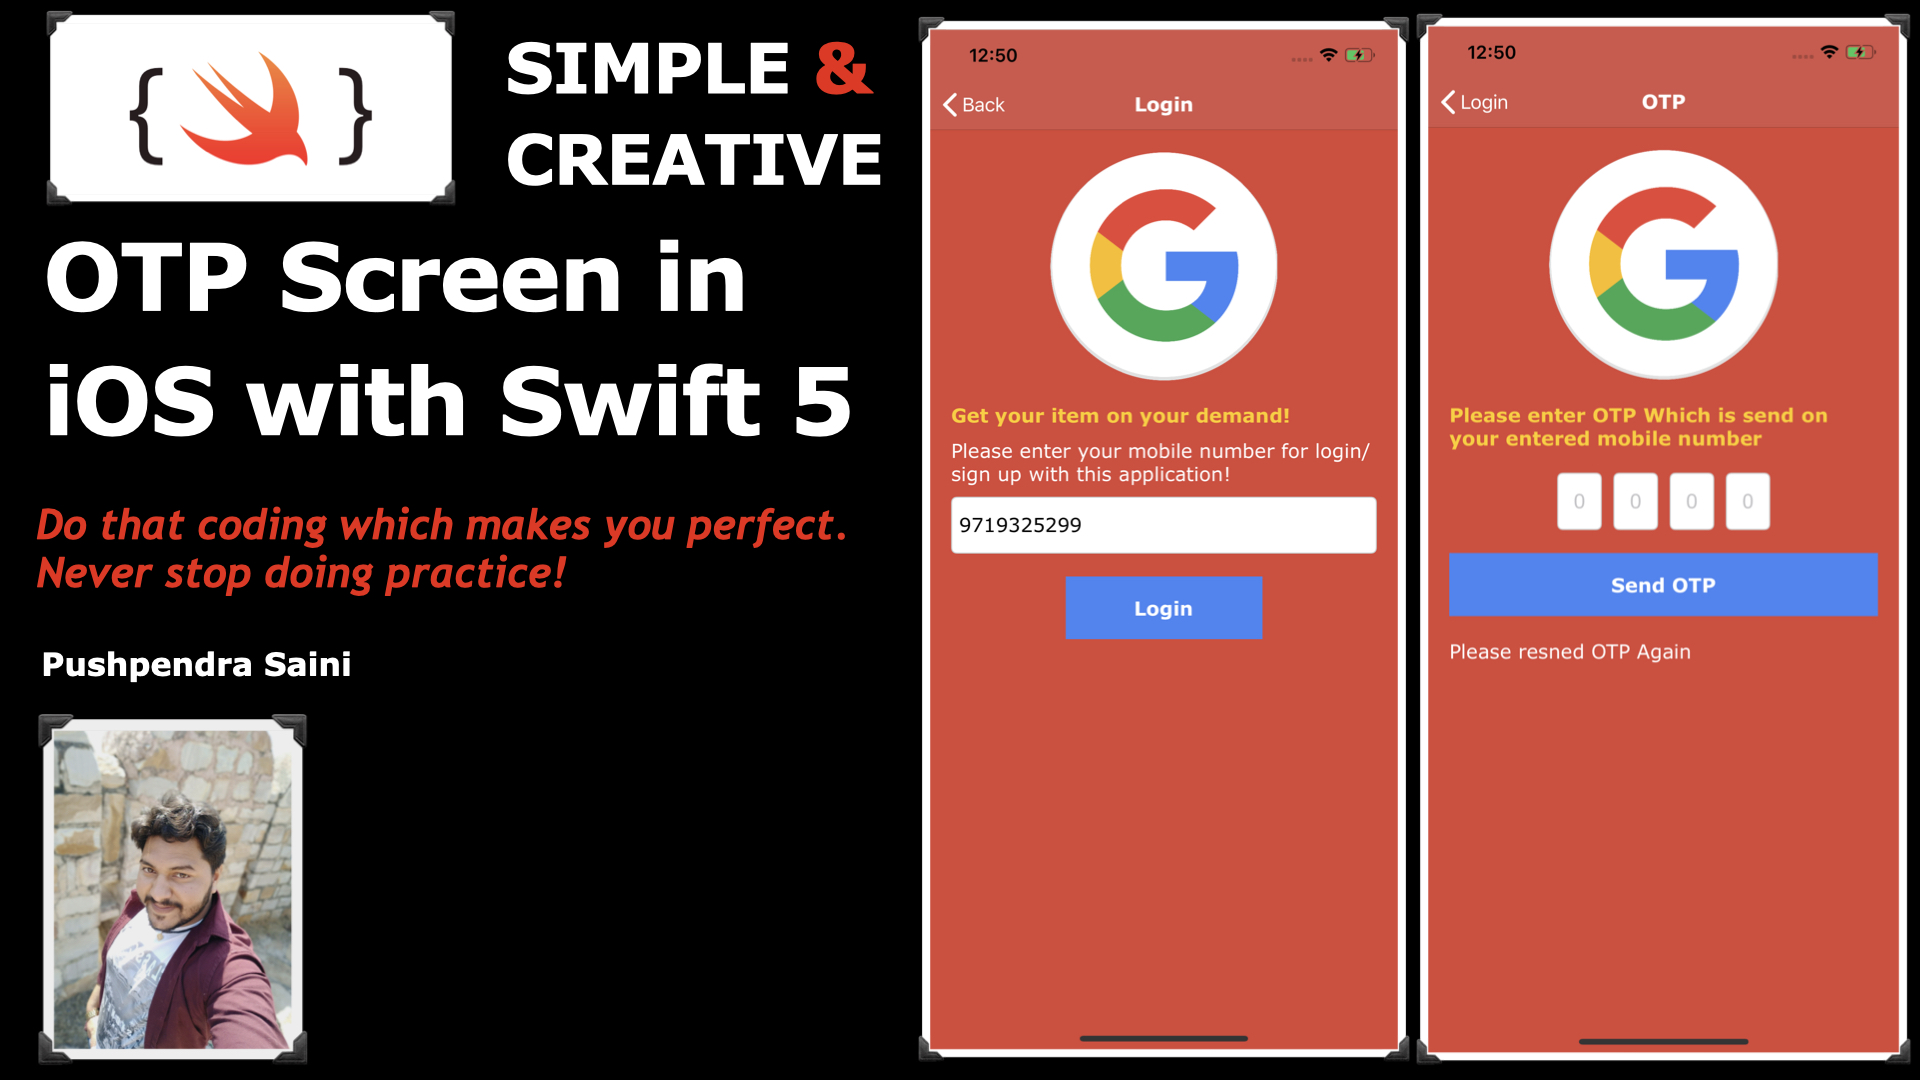
Hi Guys, Welcome to this very interesting tutorial. I have explained to you that how you can design an attractive OTP screen in iOS with a swift 5. Here also you will learn about how to design in Mobile Number screen in iOS. And many more things you will learn in this tutorial. Like how to hide the keyboard, How to swipe up your screen with a keyboard. How to handle keyboard hide and keyboard show functionality. And also you learn all functionality of the UITextField.It is quite a big tutorial but watches from the beginning to the end.
In this example, I have explained two things. Firstly we will design a screen for mobile number and secondly, we have created a screen for OTP. And on both screens, I have explained all the functionality of both screens. And in addition, you can watch the complete video below.
So As I have mention in this video. How you can design and how you can arrange all the constraint of the your view. Well Below I am giving you the complete important code of this video.
Below is the code for hiding the keyboard on view tap. This code is very simple and very important for this tutorial. You can watch the usage of this code into the above video.
extension UIViewController {
    func hideKeyBoard() {
        let tap = UITapGestureRecognizer(target: self, action: #selector(dismissKeyboard))
        tap.cancelsTouchesInView = false
        self.view.addGestureRecognizer(tap)
    }

    @objc func dismissKeyboard(){
        self.view.endEditing(true)
    }
}
Great 😊😊😊
//MARK: Observer for
NotificationCenter.default.addObserver(self, selector: #selector(keyboardWillShowNotification), name: UIResponder.keyboardWillShowNotification, object: nil)

NotificationCenter.default.addObserver(self, selector: #selector(keyboardWillHideNotification), name: UIResponder.keyboardWillHideNotification, object: nil)
Wonderful 😊😊😊😎
Increase the height of the scroller view
//MARK: Code for scrolling
   @objc func keyboardWillShowNotification(notification : Notification){
        if let frame = notification.userInfo?[UIResponder.keyboardFrameEndUserInfoKey] as? NSValue {
            let height = frame.cgRectValue.height
            self.scrollView.contentSize = CGSize(width: self.view.frame.width, height: self.scrollView.contentSize.height + height)
        }
    }

    @objc func keyboardWillHideNotification(notification : Notification){
        if let frame = notification.userInfo?[UIResponder.keyboardFrameEndUserInfoKey] as? NSValue {
            let height = frame.cgRectValue.height
            self.scrollView.contentSize = CGSize(width: self.view.frame.width, height: self.scrollView.contentSize.height - height)
        }
    }
After that 😊😊😊
//MARK: Set the properties
        self.tf1.delegate = self
        self.tf2.delegate = self
        self.tf3.delegate = self
        self.tf4.delegate = self


        self.tf1.addTarget(self, action: #selector(self.changeCharacter), for: .editingChanged)
        self.tf2.addTarget(self, action: #selector(self.changeCharacter), for: .editingChanged)
        self.tf3.addTarget(self, action: #selector(self.changeCharacter), for: .editingChanged)
        self.tf4.addTarget(self, action: #selector(self.changeCharacter), for: .editingChanged)
Finally We below is the code for the functionality of the textfield.
    @objc func changeCharacter(textField : UITextField){
        if textField.text?.utf8.count == 1 {
            switch textField {
            case tf1:
                tf2.becomeFirstResponder()
            case tf2:
                tf3.becomeFirstResponder()
            case tf3:
                tf4.becomeFirstResponder()
            case tf4:
                print("OTP = \(tf1.text!)\(tf2.text!)\(tf3.text!)\(tf4.text!)")
            default:
                break
            }
        }else if textField.text!.isEmpty {
            switch textField {
            case tf4:
                tf3.becomeFirstResponder()
            case tf3:
                tf2.becomeFirstResponder()
            case tf2:
                tf1.becomeFirstResponder()
            default:
                break
            }
        }
    }
Great 😊😊😊😊👇🏻
In Conclusion, You have done with this tutorial. And hope now the concept of OTP screen is very clear to you. If you have any doubts regarding the otp and mobile screen then you can comment into the comment box. And if you like this tutorial with a complete description of the simple and attractive OTP screen then please like my video on YouTube and do not forget to subscribe to my YouTube channel. Because you will get lots of videos related to swift development with very sort tricks.
Besides, If you are more curious about the development and knowing about tutorials then follow the below links 👇🏻👇🏻👇🏻😎