WepsTech
Your Daily Dose of Tech News
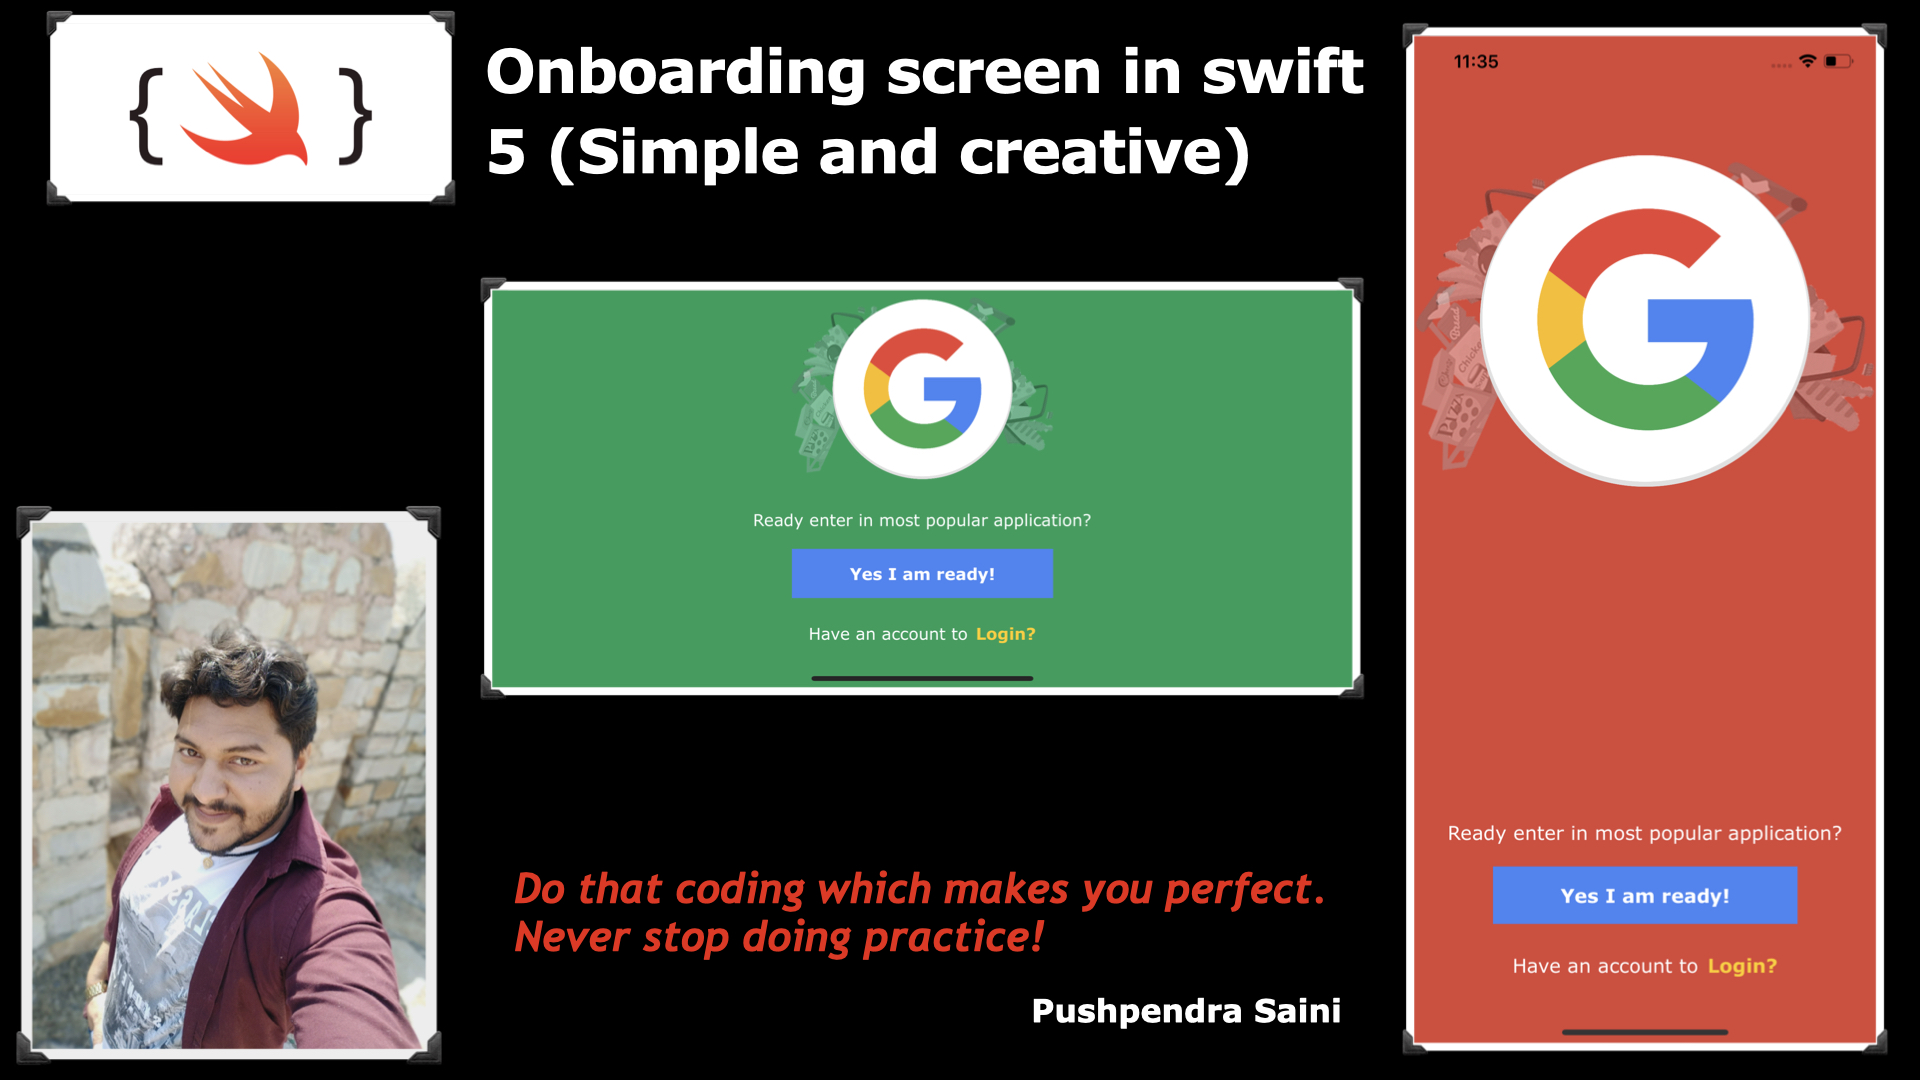
Hi Guys welcome to this tutorial. So as the this tutorial title indicates Onboarding screen in swift 5 programming language. So here we will create very simple and attractive onboarding screen for our iOS application. Or also we can describe the one page onboarding screen in iOS with swift programming language. And in this tutorial you can also understand that how to handle the constraint for portrait and landscape mode as well. So for your kind information it’s quite very simple. Because I am explaining you in this tutorial with a very simple example. So just follow the complete tutorial.
Nowadays, displaying onboarding screens to first-time users has become a common practice in mobile apps. The purpose of these onboarding screens — also referred to as walkthroughs — is to introduce the app and demonstrate what it does.
So in this tutorial we are going to cover onboarding screen in iOS 5 programming language. For the basic integration you can follow the below video.
Great😊😊
If you have seen this complete video or you are in mid of the video do not worry about the code. I will write all the code here which has been used in this tutorial. My main intention is that so you could understand the basics of the onboarding screen in swift 5. And you can make your own decision to animate views according to your requirement and design.
//
//  ViewController.swift
//  Boarding Example
//
//  Created by Pushpendra on 09/05/20.
//  Copyright © 2020 Pushpendra. All rights reserved.
//

import UIKit

class ViewController: UIViewController {
    @IBOutlet weak var footerView: UIView!
    @IBOutlet weak var logo: UIImageView!
    @IBOutlet weak var btnLogin: UIButton!

    var color : UIColor?

    override func viewDidLoad() {
        super.viewDidLoad()
        self.color = self.view.backgroundColor
        configureLayout()
    }


    func configureLayout() {
        self.footerView.transform = CGAffineTransform(translationX: 0, y: self.view.frame.height)

        self.logo.transform = CGAffineTransform(rotationAngle: 360)
        UIView.animate(withDuration: 1, animations: {
            self.logo.transform = CGAffineTransform(rotationAngle: 0)
        }, completion: nil)

        self.logo.transform = CGAffineTransform(scaleX: 0, y: 0)
        UIView.animate(withDuration: 1, animations: {
            self.logo.transform = CGAffineTransform(scaleX: 1.3, y: 1.3)
        }, completion: {(finish : Bool) in
            UIView.animate(withDuration: 0.3, animations: {
                self.logo.transform = CGAffineTransform(scaleX: 1, y: 1)
            }, completion: {(finish : Bool) in
                UIView.animate(withDuration: 0.7, animations: {
                    self.footerView.transform = CGAffineTransform(translationX: 0, y: 0)
                }, completion: nil)
            })
        })

        DispatchQueue.main.asyncAfter(wallDeadline: .now() + 1, execute: {
            UIView.animate(withDuration: 1, animations: {
                self.view.backgroundColor = .yellow
                self.btnLogin.setTitleColor(self.color!, for: .normal)
            }, completion: {(finish : Bool) in
                UIView.animate(withDuration: 1, animations: {
                    self.view.backgroundColor = self.color!
                    self.btnLogin.setTitleColor(.systemYellow, for: .normal)
                }, completion: {(finish : Bool) in
                    UIView.animate(withDuration: 1, animations: {
                        self.view.backgroundColor = .systemGreen
                    }, completion: {(finish : Bool) in
                        UIView.animate(withDuration: 1, animations: {
                            self.view.backgroundColor = self.color!
                        })
                    })
                })
            })
        })
    }
}
Wonderful 😊😊😊
In Conclusion, You have done with this tutorial. And hope now the concept of onboarding or walkthrough screen is very clear to you. If you have any doubts regarding the onboarding screen then you can comment into the comment box. And if you like this tutorial with a complete description of the simple and attractive onboarding screen then please like my video on YouTube and do not forget to subscribe to my YouTube channel. Because you will get lots of videos related to swift development with very sort tricks.
Besides, If you are more curious about the development and knowing about tutorials then follow the below links 👇🏻👇🏻👇🏻😎