WepsTech
The world of development


This is the basic tutorial which will help you to understand the basic bounce animation in the android studio. This tutorial is written into Android studio with java.
I hope you are on screen and you have already created a view or button which you want to animate on click or on view create. So let’s have look on some coding part so that you can easily achieve your task. In this tutorial, I am considering a button to animate. So define your button in your XML file like that. And in XML you do not need to apply any extra effort.
<Button
            android:id="@+id/button"
            android:layout_width="92dp"
            android:layout_height="92dp"
            android:background="#FFA400"
            android:onclick="didTapButton"
            app:layout_constraintbottom_tobottomof="parent"
            app:layout_constraintleft_toleftof="parent"
            app:layout_constraintright_torightof="parent"
            app:layout_constrainttop_totopof="parent" />
Now this time you need to create a xml file into your anim folder which is exist into layout. If anim folder is not exist then create new Directory into your layout with name anim.
Now create a new XML file in anim folder with name bounce(You can take anything). Your bounce.xml file will contain the following scaling code!
<?xml version="1.0" encoding="utf-8"?>
<set xmlns:android="http://schemas.android.com/apk/res/android">
    <scale
        android:duration="2000"
        android:fromXScale="0.3"
        android:fromYScale="0.3"
        android:pivotX="50%"
        android:pivotY="50%"
        android:toXScale="1.0"
        android:toYScale="1.0" />
</set>
Now finally you need to interpolator the bounce effect for the button! For achiving this task you need to create on new java class in your project, Let say the name of class is MyBounceInterpolator. Finally your MyBounceInterpolator class will contain the following code.
public class MyBounceInterpolator implements android.view.animation.Interpolator {
    private double mAmplitude = 1;
    private double mFrequency = 10;

    public MyBounceInterpolator(double amplitude, double frequency) {
        mAmplitude = amplitude;
        mFrequency = frequency;
    }

    public float getInterpolation(float time) {
        return (float) (-1 * Math.pow(Math.E, -time / mAmplitude) *
                Math.cos(mFrequency * time) + 1);
    }
}
Now I hope you have done with all above steps. Now you need to write the code for onclick event of your button!
Button btnMenu = findViewById(R.id.btnMenu);
btnMenu.setOnClickListener(v -> {
    final Animation myAnim = AnimationUtils.loadAnimation(this, R.anim.bounce);
    MyBounceInterpolator interpolator = new MyBounceInterpolator(0.1, 20);
    myAnim.setInterpolator(interpolator);
    v.startAnimation(myAnim);

});
Here you can listener to you animation like….
myAnim.setAnimationListener(new Animation.AnimationListener() {
    @Override
    public void onAnimationStart(Animation animation) {

    }

    @Override
    public void onAnimationRepeat(Animation animation) {

    }

    @Override
    public void onAnimationEnd(Animation animation) {
        //your action
    }
});
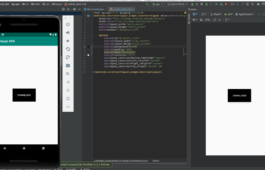
Now Run your project and see the output. After doing this I am sure you will feel happy!
Now let’s have look into deep of bounce animation! how it works and what we have done!.
We initialized the MyBounceInterpolator object with two arguments.
MyBounceInterpolator interpolator = new MyBounceInterpolator(0.2,20);
0.2 is the bounce amplitude. The higher value produces more pronounced bounces.20 is the frequency of the bounces. The higher value creates more wobbles during the animation time period.In order to achieve the bounce effect the getInterpolation method maps the time using the following function:

In this equation, a and w are the amplitude and frequency values and t is the time. The equation contains a cosine function that causes the periodic wobbles during the animation. In order to reduce its amplitude with time we multiply the cosine by an exponential function.
Good Luck 🙂 Happy Coding


ปั้มไลค์
Like!! Thank you for publishing this awesome article.
Churchs Chicken Phoenix
There are many things so much info on it. Your blog really inspires me a lot.
Best regards,
Abildgaard Raahauge
Leather Bifold Wallet
Thank you for taking the time to write and post this material.
King regards,
Harrell Henneberg