WepsTech
Your Daily Dose of Tech News
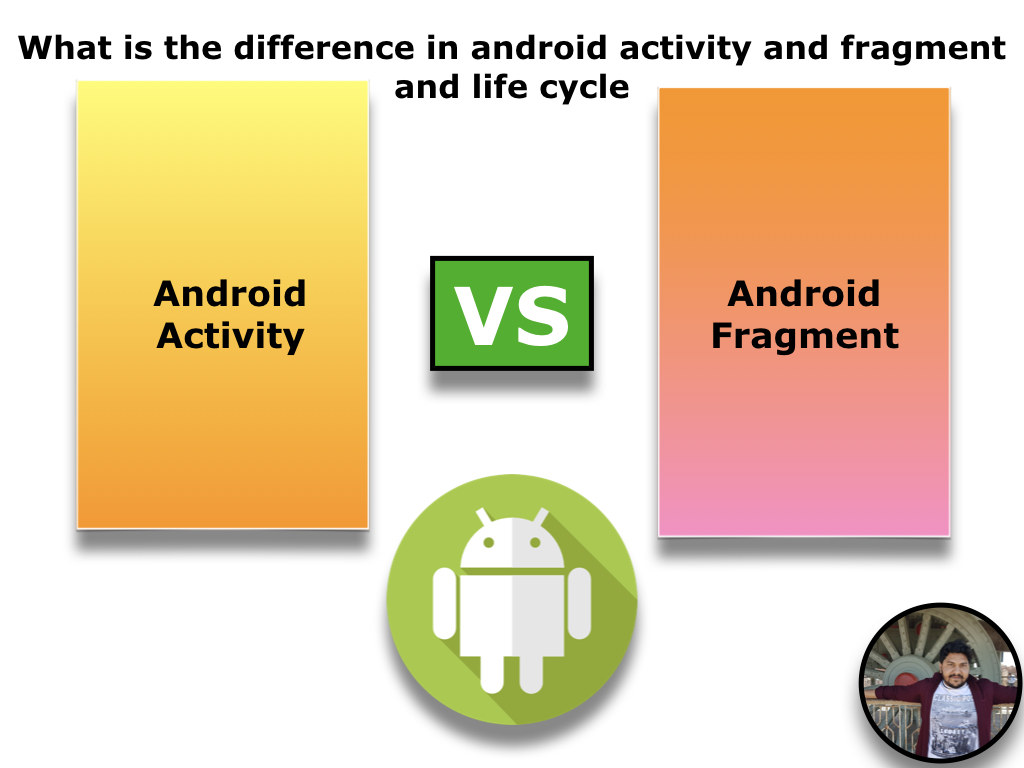
Hi Guys, Welcome here! If you are looking for the deep difference in between android activity and fragment. Then you on the correct page. So without waisting time let’s see the detailed difference both android activity and android fragment.
An Activity is an application component that provides a screen, with which users can interact in order to do something.
Whereas a Fragment represents a behavior or a portion of user interface in an Activity.
A Fragment is a section of an Activity, which has:
Activities are one of the fundamental building blocks of apps on the Android platform. They serve as the entry point for a user’s interaction with an app and are also central to how a user navigates within an app (as with the Back button) or between apps (as with the Recents button).
Skillfully managing activities allows you to ensure that, for example:
Example of Android activity and fragment
public class MainActivity extends AppCompatActivity {

    @Override
    protected void onCreate(Bundle savedInstanceState) {
        super.onCreate(savedInstanceState);
        setContentView(R.layout.activity_main);
        Log.d("MainActivity", "ONCREATE");
        getSupportFragmentManager().beginTransaction().add(R.id.container, new BlankFragment()).commit();
    }

    @Override
    protected void onStart() {
        super.onStart();
        Log.d("MainActivity", "ON START");
    }

    @Override
    protected void onResume() {
        super.onResume();
        Log.d("MainActivity", "ON RESUME");
    }

    @Override
    protected void onRestart() {
        super.onRestart();
        Log.d("MainActivity", "ON RESTART");
    }

    @Override
    protected void onPause() {
        super.onPause();
        Log.d("MainActivity", "ON Pause");
    }

    @Override
    protected void onStop() {
        super.onStop();
        Log.d("MainActivity", "ON Stop");
    }

    @Override
    protected void onDestroy() {
        super.onDestroy();
        Log.d("MainActivity", "ON DESTROY");
    }
}
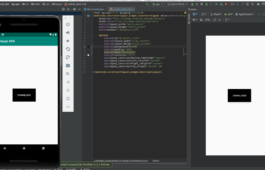
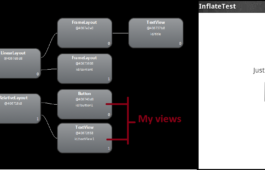
After writing the above code then just start your android application. Once you start your application then your activity will execute the function as given into the below image.

After that we will create an fragment to see the lifecycle of android fragment. So let’s begin with it.
<?xml version="1.0" encoding="utf-8"?>
<androidx.constraintlayout.widget.ConstraintLayout xmlns:android="http://schemas.android.com/apk/res/android"
    xmlns:app="http://schemas.android.com/apk/res-auto"
    xmlns:tools="http://schemas.android.com/tools"
    android:layout_width="match_parent"
    android:layout_height="match_parent"
    tools:context=".MainActivity">

    <FrameLayout
        android:id="@+id/container"
        android:layout_width="match_parent"
        android:layout_height="match_parent" />

</androidx.constraintlayout.widget.ConstraintLayout>
That’s cool, Now replace your onCreate() method in MainActivity.java
@Override
    protected void onCreate(Bundle savedInstanceState) {
        super.onCreate(savedInstanceState);
        setContentView(R.layout.activity_main);
        Log.d("MainActivity", "ONCREATE");
        getSupportFragmentManager().beginTransaction().add(R.id.container, new your_fragment_name()).commit();
    }
Create now after that, Create a hierarchy of lifecycle of Android fragment into the your_fragment_name.java
public class your_fragment_name extends Fragment {
    @Override
    public void onCreate(Bundle savedInstanceState) {
        super.onCreate(savedInstanceState);
        Log.d("BLANK_FRAGMENT", "ON CREATE");
    }

    @Override
    public View onCreateView(LayoutInflater inflater, ViewGroup container, Bundle savedInstanceState) {
        Log.d("BLANK_FRAGMENT", "ON CREATE VIEW");
        return inflater.inflate(R.layout.fragment_blank, container, false);
    }

    @Override
    public void onAttach(Context context) {
        Log.d("BLANK_FRAGMENT", "ON ATTACH");
        super.onAttach(context);
    }

    @Override
    public void onDetach() {
        Log.d("BLANK_FRAGMENT", "ON DETACH");
        super.onDetach();
    }

    @Override
    public void onActivityCreated(@Nullable Bundle savedInstanceState) {
        Log.d("BLANK_FRAGMENT", "ON ACTIVITY CREATED");
        super.onActivityCreated(savedInstanceState);
    }

    @Override
    public void onStart() {
        Log.d("BLANK_FRAGMENT", "ON START");
        super.onStart();
    }

    @Override
    public void onResume() {
        Log.d("BLANK_FRAGMENT", "ON Resume");
        super.onResume();
    }

    @Override
    public void onPause() {
        Log.d("BLANK_FRAGMENT", "ON Pause");
        super.onPause();
    }

    @Override
    public void onStop() {
        Log.d("BLANK_FRAGMENT", "ON STOP");
        super.onStop();
    }

    @Override
    public void onDestroyView() {
        Log.d("BLANK_FRAGMENT", "ON DESTROY VIEW");
        super.onDestroyView();
    }

    @Override
    public void onDestroy() {
        Log.d("BLANK_FRAGMENT", "ON DESTROY");
        super.onDestroy();
    }
}
That’s great, Now your fragment will behave as per given image. And the hierarchy also will work in same manner.

In Conclusion, I hope it’s very clear to you that what is the difference in android activity and android fragment. And I am sure that you also understand the lifecycle of an activity with the help of given example, But If still did not understand then please go through with the video. So guys once again thank you so much fo visiting on this tutorial have a great day and great time 😎😎😎


society and media
Hello, just wanted to mention, I loved this post.
It was practical. Keep on posting!