WepsTech
Your Daily Dose of Tech News
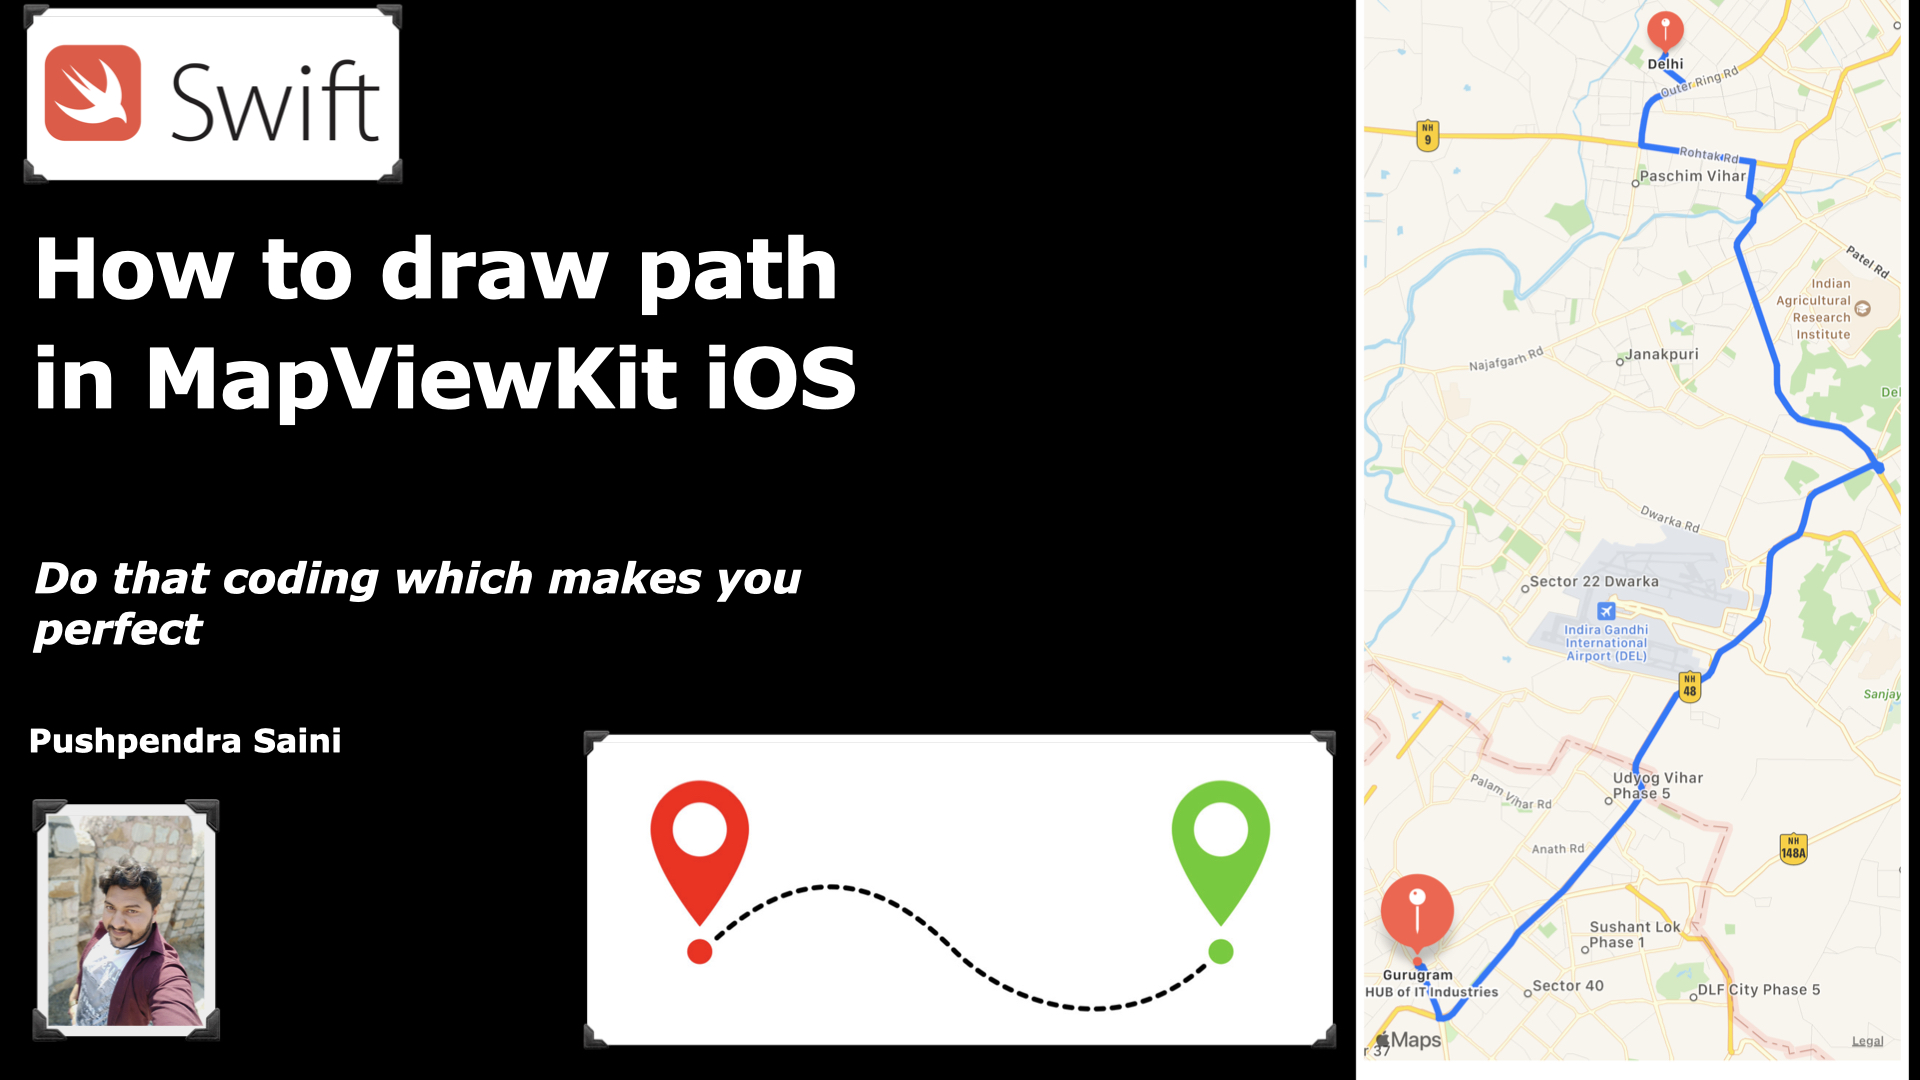
Hello Guys, Welcome to this tutorial. I hope you are doing well. Here once again I came with a new wonderful tutorial. Which is as How to draw Route in iOS with MapKit. In this tutorial, I will make you understand how you can draw routes on the map in iOS with the help of MapKit. Here I will make clear each and everything with the help of a basic example.
In this tutorial, I have explained to you how you can draw a path in between two points. Here we take one point as a source and another we will take as a destination. So let’s start with the development.
At the very first you need to add your MapView to your view controller. And after that, you need to set the outlet of your MapView to your ViewController.swift

Wonderful 😊😊😊😊, If you do not know about MKMapView then read below.
Provides an embeddable map interface, similar to the one provided by the Maps application. You use this class as-is to display map information and to manipulate the map contents from your application. You can center the map on a given coordinate, specify the size of the area you want to display, and annotate the map with custom information.
MKMapView
After all that, Let’s do some programming to achieve our main goal. The Coding exist blow related with MKMapView. So please read carefully and if you want more details then you can watch this video.
mport UIKit
import MapKit
class ViewController: UIViewController {
@IBOutlet weak var mapView: MKMapView!
override func viewDidLoad() {
super.viewDidLoad()
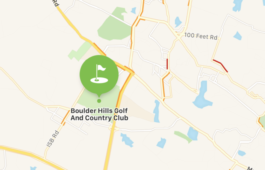
let sourceLocation = CLLocationCoordinate2D(latitude: 28.704060, longitude: 77.102493)
let destinationLocation = CLLocationCoordinate2D(latitude: 28.459497, longitude: 77.026634)
createPath(sourceLocation: sourceLocation, destinationLocation: destinationLocation)
self.mapView.delegate = self
}
func createPath(sourceLocation : CLLocationCoordinate2D, destinationLocation : CLLocationCoordinate2D) {
let sourcePlaceMark = MKPlacemark(coordinate: sourceLocation, addressDictionary: nil)
let destinationPlaceMark = MKPlacemark(coordinate: destinationLocation, addressDictionary: nil)
let sourceMapItem = MKMapItem(placemark: sourcePlaceMark)
let destinationItem = MKMapItem(placemark: destinationPlaceMark)
let sourceAnotation = MKPointAnnotation()
sourceAnotation.title = "Delhi"
sourceAnotation.subtitle = "The Capital of INIDA"
if let location = sourcePlaceMark.location {
sourceAnotation.coordinate = location.coordinate
}
let destinationAnotation = MKPointAnnotation()
destinationAnotation.title = "Gurugram"
destinationAnotation.subtitle = "The HUB of IT Industries"
if let location = destinationPlaceMark.location {
destinationAnotation.coordinate = location.coordinate
}
self.mapView.showAnnotations([sourceAnotation, destinationAnotation], animated: true)
let directionRequest = MKDirections.Request()
directionRequest.source = sourceMapItem
directionRequest.destination = destinationItem
directionRequest.transportType = .automobile
let direction = MKDirections(request: directionRequest)
direction.calculate { (response, error) in
guard let response = response else {
if let error = error {
print("ERROR FOUND : \(error.localizedDescription)")
}
return
}
let route = response.routes[0]
self.mapView.addOverlay(route.polyline, level: MKOverlayLevel.aboveRoads)
let rect = route.polyline.boundingMapRect
self.mapView.setRegion(MKCoordinateRegion(rect), animated: true)
}
}
}
extension ViewController : MKMapViewDelegate {
func mapView(_ mapView: MKMapView, rendererFor overlay: MKOverlay) -> MKOverlayRenderer {
let rendere = MKPolylineRenderer(overlay: overlay)
rendere.lineWidth = 5
rendere.strokeColor = .systemBlue
return rendere
}
}
😊😊😎 That’s all..! In Conclusion you have achieved your milestone. Now if you want more information or any deep knowledge about Map in iOS the you can comment into the comment box and also you can watch the video.
If you are looking related videos than you can check the below links.