WepsTech
The world of development

Let’s begin with the ML, Here you will learn how to work with machine learning. And in my android application tutorial I am taking base is Firebase ML Kit. If you want to know more about machine learning then you can click here. So in a very simple way let’s start with the following steps. And keep in mind this tutorial is based on Kotlin language.
Lets suppose you have done with your project integration now you have to do some work with firebase, because we are going to use Firebase ML Kit for the machine learning integration. So again follow few steps.
In the overall Machine Learning Tutorial we are going to cover the following things
How to get started with Android To get started with ML Kit just need to add the library in gradle and you are ready to go.
Include the dependency first in your app Gradle file
implementation 'com.google.android.gms:play-services-vision:17.0.2'

And add this line into androidManifest
Now you have successful done with first step integration with the Firebase ML Kit.
Create New Kotline class with FaceOverlayView name. We are going to cover the face detection.
class FaceOverlayView @JvmOverloads constructor(context: Context, attrs: AttributeSet? = null, defStyleAttr: Int = 0) : View(context, attrs, defStyleAttr) {
    private var mBitmap: Bitmap? = null
    private var mFaces: SparseArray? = null

    fun setBitmap(bitmap: Bitmap) {
        mBitmap = bitmap

        val detector = FaceDetector.Builder(context)
                .setTrackingEnabled(false)
                .setLandmarkType(FaceDetector.ALL_LANDMARKS)
                .setMode(FaceDetector.FAST_MODE)
                .build()

        if (!detector.isOperational) {
        } else {
            val frame = Frame.Builder().setBitmap(bitmap).build()
            mFaces = detector.detect(frame)
            detector.release()
        }
        invalidate()
    }

    override fun onDraw(canvas: Canvas) {
        super.onDraw(canvas)

        if (mBitmap != null && mFaces != null) {
            val scale = drawBitmap(canvas)
            drawFaceBox(canvas, scale)
        }
    }

    private fun drawBitmap(canvas: Canvas): Double {
        val viewWidth = canvas.width.toDouble()
        val viewHeight = canvas.height.toDouble()
        val imageWidth = mBitmap?.width
        val imageHeight = mBitmap?.height
        val scale = Math.min(viewWidth / imageWidth!!, viewHeight / imageHeight!!)

        val destBounds = Rect(0, 0, (imageWidth * scale).toInt(), (imageHeight * scale).toInt())
        canvas.drawBitmap(mBitmap, null, destBounds, null)
        return scale
    }

    private fun drawFaceBox(canvas: Canvas, scale: Double) {
        //paint should be defined as a member variable rather than
        //being created on each onDraw request, but left here for
        //emphasis.
        val paint = Paint()
        paint.color = Color.GREEN
        paint.style = Paint.Style.STROKE
        paint.strokeWidth = 5.0f

        var left = 0f
        var top = 0f
        var right = 0f
        var bottom = 0f

        for (i in 0 until mFaces?.size()!!) {
            val face = mFaces?.valueAt(i)

            if (face != null) {
                left = (face.position.x * scale).toFloat()
            }
            if (face != null) {
                top = (face.position.y * scale).toFloat()
            }
            if (face != null) {
                right = scale.toFloat() * (face.position.x + face.width)
            }
            if (face != null) {
                bottom = scale.toFloat() * (face.position.y + face.height)
            }

            canvas.drawRect(left, top, right, bottom, paint)
        }
    }
}
In next step you need to import some package above the class which is as –
import android.content.Context
import android.util.SparseArray
import android.util.AttributeSet
import android.view.View
import android.graphics.*
import android.widget.Toast
import com.google.android.gms.vision.Frame
import com.google.android.gms.vision.face.Face
import com.google.android.gms.vision.face.FaceDetector
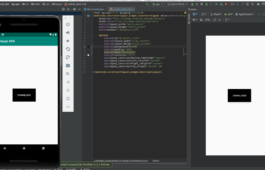
Now we I am going to define the XML of MainActivity.
Upto now you have done very well!. Now let’s come back to the MainActivity and keep in mind the MainActivity must have AppCompatActivity. Write some code of line in onCreate(savedInstanceState: Bundle?).
val faceImage = findViewById(R.id.face_overlay);
        val stream = resources.openRawResource(R.raw.mans_im)
        val bitmap = BitmapFactory.decodeStream(stream)
        faceImage.setBitmap(bitmap)
So that’s great you have done with the face detection, and I hope this is your best experiment. Now you can continue with upcoming tutorial.
Good Luck 🙂 Happy Coding